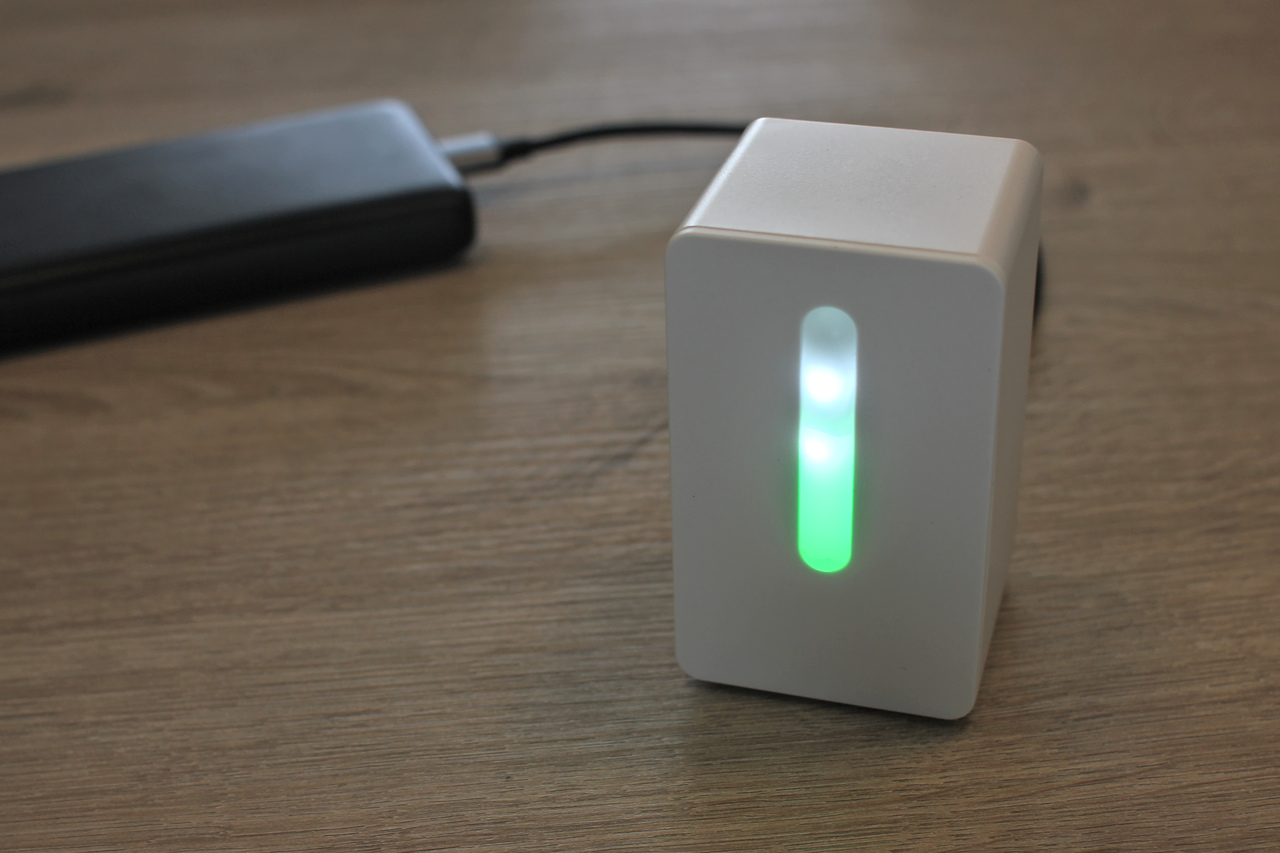
Monitoring the air quality in spaces where you spend a lot of time can be a game-changer for your well-being and
productivity. However, the air quality monitor built-in a previous post is tightly linked with Home Assistant (HA),
which might limit its use in environments like offices, workshops, garages, and more. The good news? We can easily add
additional LEDs and link them to the new sensor values directly in ESPHome, so those will work even when not connected
to HA. Furthermore, the esp8266 is just powerful enough to function as a WiFi access point while hosting a
web page that displays all sensor readings. This guide will walk you through adding additional status LEDs and
reconfiguring ESPHome to unlock this stand-alone functionality, turning your air quality monitor into a
tool that can be used anywhere!

What you need?
This post will start from the DIY smart air quality sensor which you can build from an IKEA Vindriktning Air Quality
Sensor, an ESP8266 and Bosch BME680 (humidity, pressure, temperature and volatile organic compound (VOC) sensor). Though
we can additionally add two white LEDs, that can be programmed to give a visual cue to the BME680 readings and hence
make it better suited for stand-alone operation. This will require small LEDs (e.g. 1.8mm) which operate at 2 V and one
82 Ohm resistor per LED (I used two, but you can easily add a few more if needed).
The full list of components:
- IKEA Vindriktning Air Quality Monitor
- Wemos D1 Mini Pro Microcontroller Board or another small ESP8266 board that fits in the Vindriktning’s case
- Bosch BME680 Sensor Board
- 2x 1.8mm LEDs
- 2x 82 Ohm resistors
- UV Resin (to glue LEDs)
- Wire (scavenged from a USB cable)
- Soldering tools (iron, solder, flux, …)
If you landed on this page first, start with building the DIY smart air quality sensor described in a previous post.
This will help you get ESPHome set up and wire all sensors correctly to the microcontroller board.
Upgrading the sensor (optional)
If you don’t wish to install extra status LEDs, feel free to skip this section.
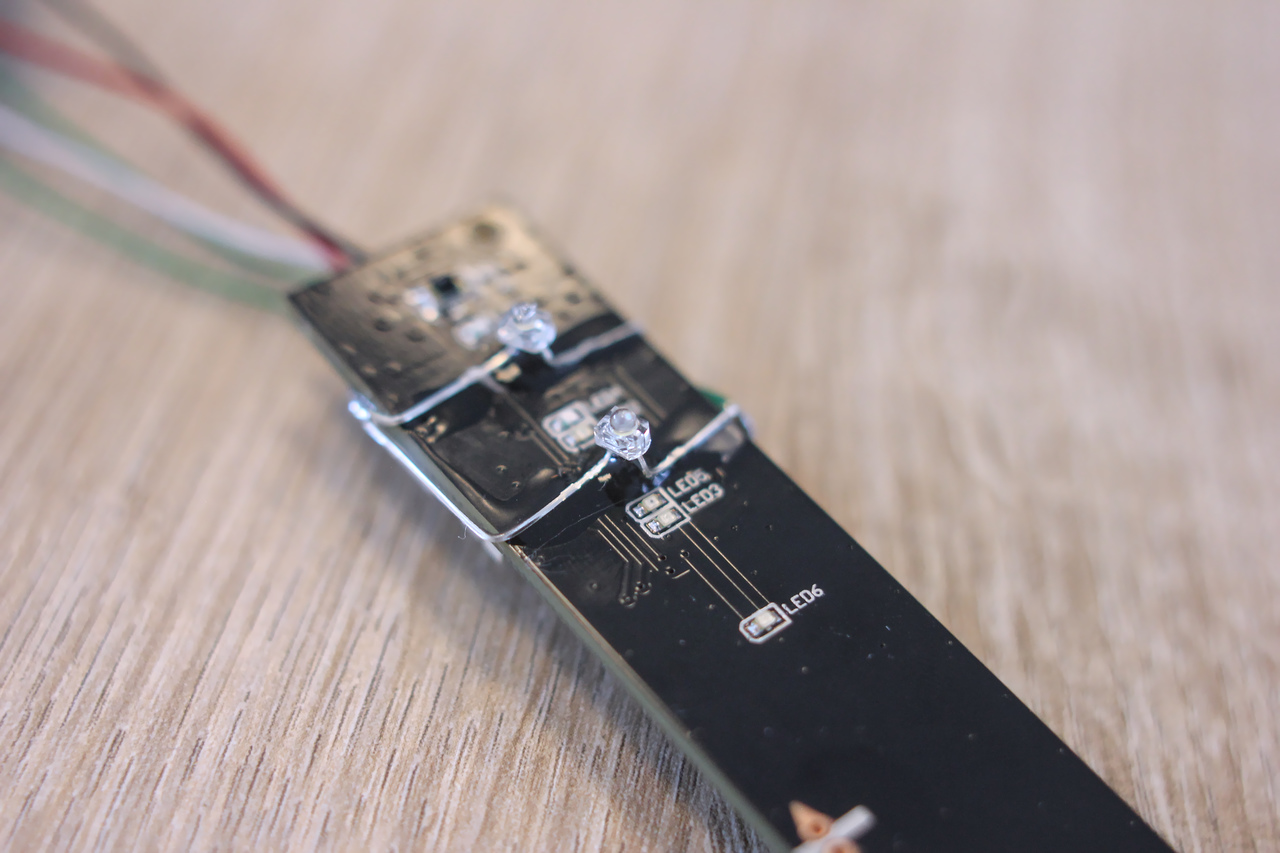
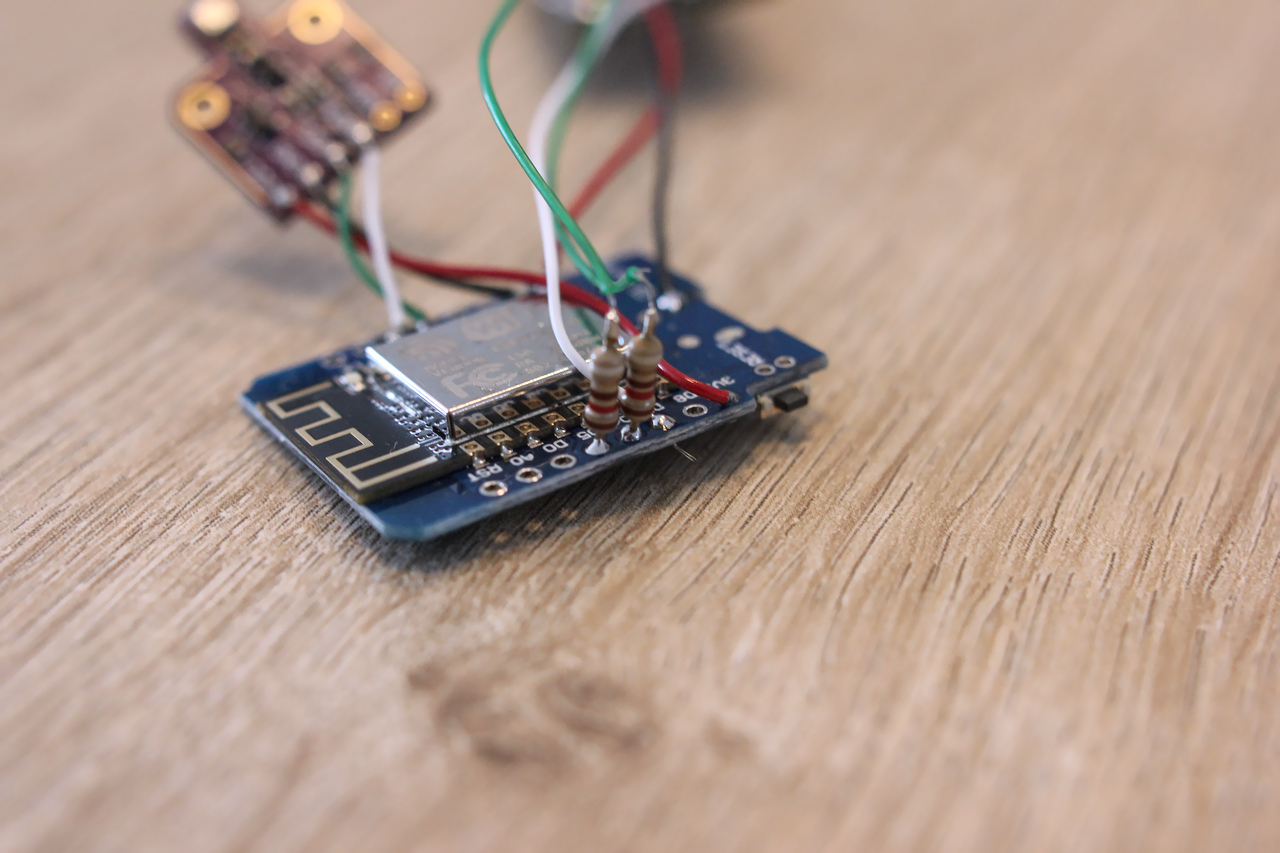
After removing the Vindriktning PCB, I used UV-resin to glue two 1.8mm white LEDs to the front of the PCB in between
the SMD LEDs. Be careful when bending the pins, I broke a few LEDs in the process!
Make sure to align the LEDs with the existing ones. I failed to do this, and it becomes incredibly visible once the
LEDs were on.

The ground pins were connected to the
ground pad of an unpopulated connector on the Vindriktning board.
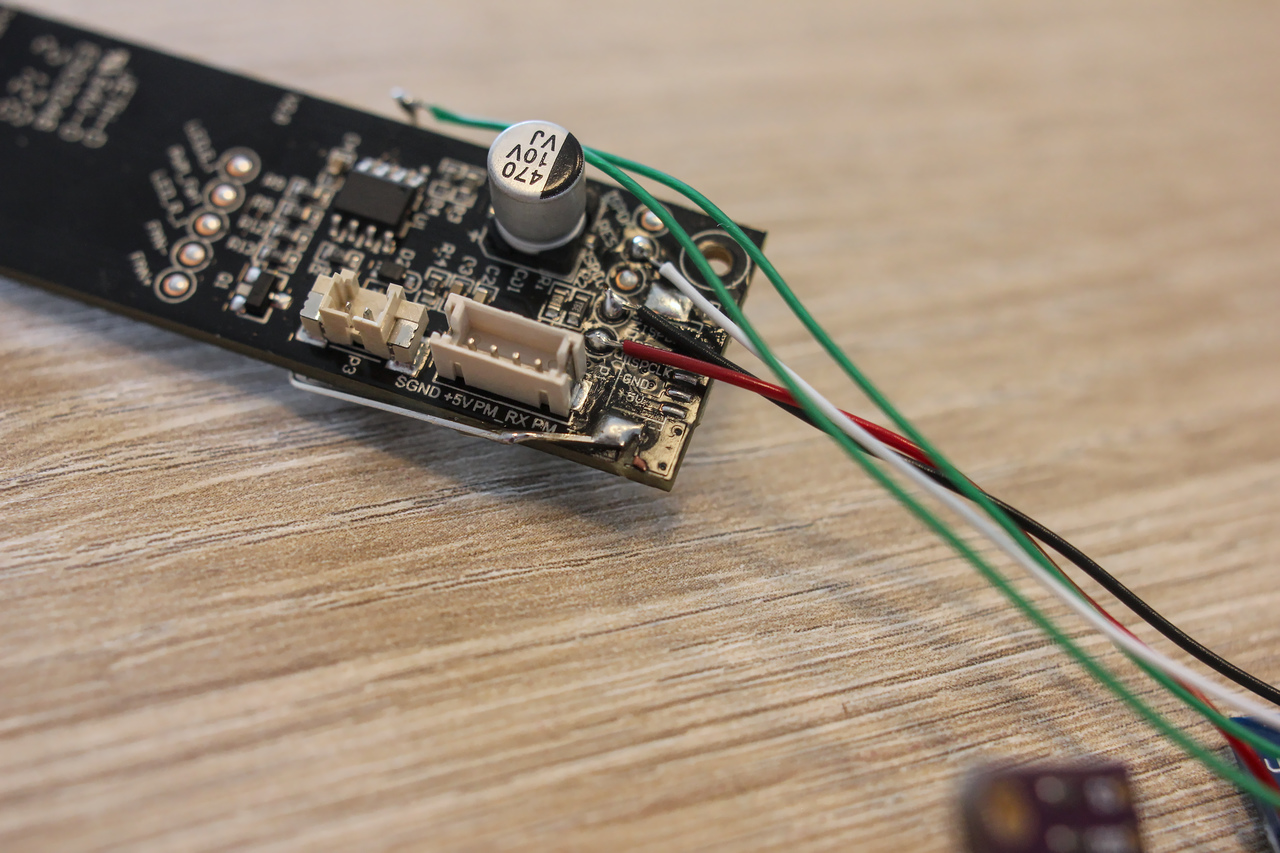
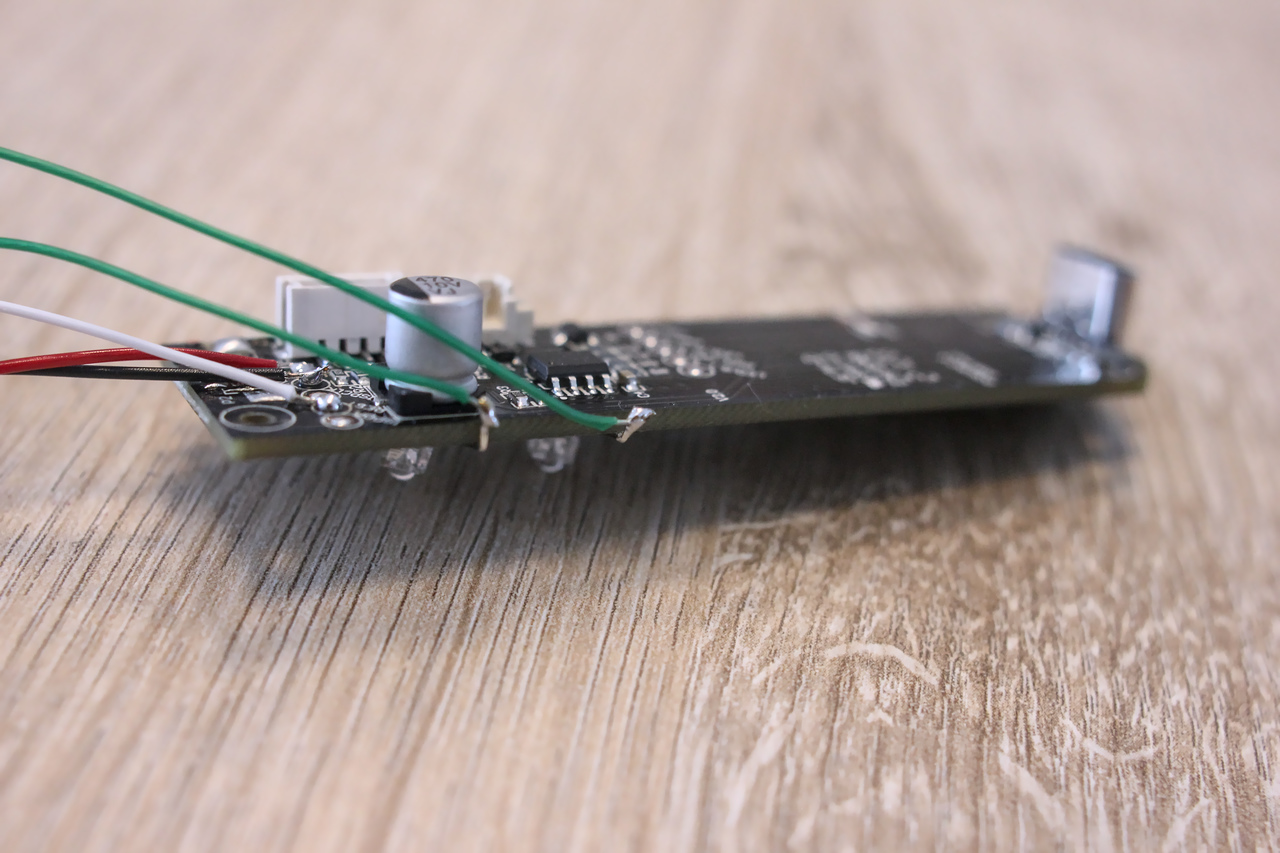
The pictures below show how the anode of the LEDs (aka positive leads), are connected to pins D5 and D6 of the D1
mini. The required 82 Ohm resistors to connect 2V LEDs to the board’s 3.3V output, were directly soldered to the
board, and wires connecting to the LEDs’ anodes to the other end of the resistors.

Now let’s configure the D1 Mini to use the new LEDs, and switch them on automatically based on the Indoor Air Quality
(IAQ) reported by the BME680. The bulk of the configuration is identical to the previous post, but we do need to specify
where our LEDs are connected to, adding the code below sets these up.
light:
  - platform: monochromatic
    name: "Bottom Light"
    output: output_led_one
    id: bottom_light
  - platform: monochromatic
    name: "Top Light"
    output: output_led_two
    id: top_light

output:
  - platform: esp8266_pwm
    id: output_led_one
    pin: D5
  - platform: esp8266_pwm
    id: output_led_two
    pin: D6
Next, a template was added that maps the BME680 IAQ values to human-readable labels. Here, we’ll hook the automation in
esphome directly, so the LEDs will switch on or off based on those values.
text_sensor:
  - platform: template
    name: "BME680 IAQ Classification"
    icon: "mdi:checkbox-marked-circle-outline"
    lambda: |-
      auto label = "error";
      auto call1 = id(bottom_light).turn_off();
      auto call2 = id(top_light).turn_off();
      if ( int(id(iaq).state) <= 50) {
        label = "Excellent";
      }
      else if (int(id(iaq).state) >= 51 && int(id(iaq).state) <= 100) {
        label = "Good";
      }
      else if (int(id(iaq).state) >= 101 && int(id(iaq).state) <= 150) {
        call1 = id(bottom_light).turn_on();
        label = "Lightly polluted";
      }
      else if (int(id(iaq).state) >= 151 && int(id(iaq).state) <= 200) {
        call1 = id(bottom_light).turn_on();
        label = "Moderately polluted";
      }
      else if (int(id(iaq).state) >= 201 && int(id(iaq).state) <= 250) {
        call2 = id(top_light).turn_on();
        label = "Heavily polluted";
      }
      else if (int(id(iaq).state) >= 251 && int(id(iaq).state) <= 350) {
        call2 = id(top_light).turn_on();
        label = "Severely polluted";
      }
      else if (int(id(iaq).state) >= 351) {
        call1 = id(bottom_light).turn_on();
        call2 = id(top_light).turn_on();
        label = "Extremely polluted";
      }
      call1.set_brightness(0.5);
      call2.set_brightness(0.5);
      call1.perform();
      call2.perform();
      return {label};
The full configuration is included below (do note you need a file secrets.yaml with your WiFi ssid and password).
If you need help flashing this to your device, look at the previous post for details.
esphome:
  name: upgraded-sensor
  friendly_name: Upgraded sensor

esp8266:
  board: d1_mini

# Enable logging
logger:

# Enable Home Assistant API
api:
  encryption:
    key: "r5e+0e+eigBjFpfNo+r/TIykX9lK40oG7+2NZ3RiG08="

ota:
  password: "eb24ad75972211d1fea73e45f5b90661"

wifi:
  ssid: !secret wifi_ssid
  password: !secret wifi_password

  # Enable fallback hotspot (captive portal) in case wifi connection fails
  ap:
    ssid: "Upgraded sensor"
    password: !secret wifi_password

captive_portal:


## Serial Port for the IKEA Sensor
uart:
  - rx_pin: D7
    # tx_pin: D8
    baud_rate: 9600

i2c:
  ## I²C Port - For Temp/Humidity/Pressure & CO²/VOC Sensors
  sda: D1
  scl: D2
  scan: true
  id: bus_a

bme680_bsec:
    # id
    # -----------
    # Identifier for this component, useful when working with multiple devices.
    # Must be unique, and can be used in the sensor sections to refer to the correct device.
    # Default: auto-computed
    id: bme680_internal

    # i2c address
    # -----------
    # Common values are:
    # - 0x76
    # - 0x77
    # Default: 0x76
    address: 0x77

    # Temperature offset
    # ------------------
    # Useful if device is in enclosure and reads too high
    # For example, if it reads 5C too high, set this to 5
    # This also corrects the relative humidity readings
    # Default: 0
    temperature_offset: 4.4

    # IAQ calculation mode
    # --------------------
    # Available options:
    # - static (for fixed position devices)
    # - mobile (for on a person or other moveable devices)
    # Default: static
    iaq_mode: mobile

    # Sample rate
    # -----------
    # Available options:
    # - lp (low power - samples every 3 seconds)
    # - ulp (ultra-low power - samples every 5 minutes)
    # Default: lp
    sample_rate: lp

    # Interval at which to save BSEC state
    # ------------------------------------
    # Default: 6h
    state_save_interval: 6h

sensor:
  ## IKEA PMS 2.5um Sensor
  - platform: pm1006
    id: aq_sensor
    pm_2_5:
      name: "IKEA 2.5µg"

  - platform: bme680_bsec
    # ID of the bme680_bsec component to use for the next sensors.
    # Useful when working with multiple devices
    bme680_bsec_id: bme680_internal

    temperature:
      # Temperature in °C
      name: "BME680 Temperature"
      sample_rate: lp
      filters:
        - median
    pressure:
      # Pressure in hPa
      name: "BME680 Pressure"
      sample_rate: lp
      filters:
        - median
    humidity:
      # Relative humidity %
      name: "BME680 Humidity"
      sample_rate: lp
      filters:
        - median
    gas_resistance:
      # Gas resistance in Ω
      name: "BME680 Gas Resistance"
      filters:
        - median
    iaq:
      # Indoor air quality value
      name: "BME680 IAQ"
      id: iaq
      filters:
        - median
        # - calibrate_linear:
          # - 137.0 -> 27.0
          # - 181.0 -> 189.0
          # - 430.0 -> 436
    iaq_accuracy:
      # IAQ accuracy as a numeric value of 0, 1, 2, 3
      name: "BME680 Numeric IAQ Accuracy"
    co2_equivalent:
      # CO2 equivalent estimate in ppm
      name: "BME680 CO2 Equivalent"
      filters:
        - median
    breath_voc_equivalent:
      # Volatile organic compounds equivalent estimate in ppm
      name: "BME680 Breath VOC Equivalent"
      filters:
        - median

text_sensor:
  - platform: bme680_bsec
    iaq_accuracy:
      # IAQ accuracy as a text value of Stabilizing, Uncertain, Calibrating, Calibrated
      name: "BME680 IAQ Accuracy"

  - platform: template
    name: "BME680 IAQ Classification"
    icon: "mdi:checkbox-marked-circle-outline"
    lambda: |-
      auto label = "error";
      auto call1 = id(bottom_light).turn_off();
      auto call2 = id(top_light).turn_off();
      if ( int(id(iaq).state) <= 50) {
        label = "Excellent";
      }
      else if (int(id(iaq).state) >= 51 && int(id(iaq).state) <= 100) {
        label = "Good";
      }
      else if (int(id(iaq).state) >= 101 && int(id(iaq).state) <= 150) {
        call1 = id(bottom_light).turn_on();
        label = "Lightly polluted";
      }
      else if (int(id(iaq).state) >= 151 && int(id(iaq).state) <= 200) {
        call1 = id(bottom_light).turn_on();
        label = "Moderately polluted";
      }
      else if (int(id(iaq).state) >= 201 && int(id(iaq).state) <= 250) {
        call2 = id(top_light).turn_on();
        label = "Heavily polluted";
      }
      else if (int(id(iaq).state) >= 251 && int(id(iaq).state) <= 350) {
        call2 = id(top_light).turn_on();
        label = "Severely polluted";
      }
      else if (int(id(iaq).state) >= 351) {
        call1 = id(bottom_light).turn_on();
        call2 = id(top_light).turn_on();
        label = "Extremely polluted";
      }
      call1.set_brightness(0.5);
      call2.set_brightness(0.5);
      call1.perform();
      call2.perform();
      return {label};

light:
  - platform: monochromatic
    name: "Bottom Light"
    output: output_led_one
    id: bottom_light
  - platform: monochromatic
    name: "Top Light"
    output: output_led_two
    id: top_light

output:
  - platform: esp8266_pwm
    id: output_led_one
    pin: D5
  - platform: esp8266_pwm
    id: output_led_two
    pin: D6
If you wish to let HA control the new LEDs, you can! Simply replace the lambda function that generates the IAQ with the
one below (which doesn’t switch the LEDs on and off based on the new sensor readings, leaving them free to be controlled by
HA)
  - platform: template
    name: "BME680 IAQ Classification"
    icon: "mdi:checkbox-marked-circle-outline"
    lambda: |-
      auto label = "error";
      if ( int(id(iaq).state) <= 50) {
        label = "Excellent";
      }
      else if (int(id(iaq).state) >= 51 && int(id(iaq).state) <= 100) {
        label = "Good";
      }
      else if (int(id(iaq).state) >= 101 && int(id(iaq).state) <= 150) {
        label = "Lightly polluted";
      }
      else if (int(id(iaq).state) >= 151 && int(id(iaq).state) <= 200) {
        label = "Moderately polluted";
      }
      else if (int(id(iaq).state) >= 201 && int(id(iaq).state) <= 250) {
        label = "Heavily polluted";
      }
      else if (int(id(iaq).state) >= 251 && int(id(iaq).state) <= 350) {
        label = "Severely polluted";
      }
      else if (int(id(iaq).state) >= 351) {
        label = "Extremely polluted";
      }
      return {label};
Setting up ESPHome as an access point and running the web server
Adding extra status LEDs offers a quick snapshot of the air quality as measured by the BME680, but this method lacks
detailed resolution. If relying on Home Assistant for precise readings isn’t feasible, configuring the device as
a standalone WiFi access point and hosting a webpage to display these values presents a robust solution.
The full configuration below mirrors our previous setup but with a key difference in the wifi
configuration and the introduction of the web_server section. The adjustments in the wifi settings activate the
ESP8266’s access point functionality. By including the
web_server, we incorporate the ESPHome Web Server Component, effectively launching a local web server. This server
hosts a webpage which includes a read-out of all connected sensors’ values, exposing them to all devices connected to
the access point.
Important Note: When configured as a WiFi access point, the device cannot connect to HA or receive
firmware updates over the air via the esphome command. To install new firmware, you must access the device’s webpage
and upload the firmware from there. If you disable ota in the web_server component, the only way to update the
firmware will be by directly flashing it through a cable.
##### Stand-alone Access Point Config #####
api:
  reboot_timeout: 24h

ota:
  password: "eb24ad75972211d1fea73e45f5b90661"

wifi:
  ap:
    ssid: "Upgraded sensor"
    password: "BadAir2024"

web_server:
  port: 80
  local: true
  ota: true
The full configuration, including the configuration of all connected sensors, is shown below.
esphome:
  name: upgraded-sensor
  friendly_name: Upgraded sensor

esp8266:
  board: d1_mini

# Enable logging
logger:

##### Stand-alone Access Point Config #####
api:
  # ESPHome will reboot if Home Assistant or any other client won't access it within the indicated
  # timeout in reboot_timeout, as a "watchdog" condition.
  # If you need to use ESPHome standalone, set reboot_timeout to something greater than the default
  # 15min
  reboot_timeout: 24h

ota:
  password: "eb24ad75972211d1fea73e45f5b90661"

wifi:
  ap:
    ssid: "Upgraded sensor"
    password: "BadAir2024"

web_server:
  port: 80
  local: true
  ota: true


## Serial Port for the IKEA Sensor
uart:
  - rx_pin: D7
    # tx_pin: D8
    baud_rate: 9600

i2c:
  ## I²C Port - For Temp/Humidity/Pressure & CO²/VOC Sensors
  sda: D1
  scl: D2
  scan: true
  id: bus_a

bme680_bsec:
    # id
    # -----------
    # Identifier for this component, useful when working with multiple devices.
    # Must be unique, and can be used in the sensor sections to refer to the correct device.
    # Default: auto-computed
    id: bme680_internal

    # i2c address
    # -----------
    # Common values are:
    # - 0x76
    # - 0x77
    # Default: 0x76
    address: 0x77

    # Temperature offset
    # ------------------
    # Useful if device is in enclosure and reads too high
    # For example, if it reads 5C too high, set this to 5
    # This also corrects the relative humidity readings
    # Default: 0
    temperature_offset: 4.4

    # IAQ calculation mode
    # --------------------
    # Available options:
    # - static (for fixed position devices)
    # - mobile (for on a person or other moveable devices)
    # Default: static
    iaq_mode: mobile

    # Sample rate
    # -----------
    # Available options:
    # - lp (low power - samples every 3 seconds)
    # - ulp (ultra-low power - samples every 5 minutes)
    # Default: lp
    sample_rate: lp

    # Interval at which to save BSEC state
    # ------------------------------------
    # Default: 6h
    state_save_interval: 6h

sensor:
  ## IKEA PMS 2.5um Sensor
  - platform: pm1006
    id: aq_sensor
    pm_2_5:
      name: "IKEA 2.5µg"

  - platform: bme680_bsec
    # ID of the bme680_bsec component to use for the next sensors.
    # Useful when working with multiple devices
    bme680_bsec_id: bme680_internal

    temperature:
      # Temperature in °C
      name: "BME680 Temperature"
      sample_rate: lp
      filters:
        - median
    pressure:
      # Pressure in hPa
      name: "BME680 Pressure"
      sample_rate: lp
      filters:
        - median
    humidity:
      # Relative humidity %
      name: "BME680 Humidity"
      sample_rate: lp
      filters:
        - median
    gas_resistance:
      # Gas resistance in Ω
      name: "BME680 Gas Resistance"
      filters:
        - median
    iaq:
      # Indoor air quality value
      name: "BME680 IAQ"
      id: iaq
      filters:
        - median
        # - calibrate_linear:
          # - 137.0 -> 27.0
          # - 181.0 -> 189.0
          # - 430.0 -> 436
    iaq_accuracy:
      # IAQ accuracy as a numeric value of 0, 1, 2, 3
      name: "BME680 Numeric IAQ Accuracy"
    co2_equivalent:
      # CO2 equivalent estimate in ppm
      name: "BME680 CO2 Equivalent"
      filters:
        - median
    breath_voc_equivalent:
      # Volatile organic compounds equivalent estimate in ppm
      name: "BME680 Breath VOC Equivalent"
      filters:
        - median

text_sensor:
  - platform: bme680_bsec
    iaq_accuracy:
      # IAQ accuracy as a text value of Stabilizing, Uncertain, Calibrating, Calibrated
      name: "BME680 IAQ Accuracy"

  - platform: template
    name: "BME680 IAQ Classification"
    icon: "mdi:checkbox-marked-circle-outline"
    lambda: |-
      auto label = "error";
      auto call1 = id(bottom_light).turn_off();
      auto call2 = id(top_light).turn_off();
      if ( int(id(iaq).state) <= 50) {
        label = "Excellent";
      }
      else if (int(id(iaq).state) >= 51 && int(id(iaq).state) <= 100) {
        label = "Good";
      }
      else if (int(id(iaq).state) >= 101 && int(id(iaq).state) <= 150) {
        call1 = id(bottom_light).turn_on();
        label = "Lightly polluted";
      }
      else if (int(id(iaq).state) >= 151 && int(id(iaq).state) <= 200) {
        call1 = id(bottom_light).turn_on();
        label = "Moderately polluted";
      }
      else if (int(id(iaq).state) >= 201 && int(id(iaq).state) <= 250) {
        call2 = id(top_light).turn_on();
        label = "Heavily polluted";
      }
      else if (int(id(iaq).state) >= 251 && int(id(iaq).state) <= 350) {
        call2 = id(top_light).turn_on();
        label = "Severely polluted";
      }
      else if (int(id(iaq).state) >= 351) {
        call1 = id(bottom_light).turn_on();
        call2 = id(top_light).turn_on();
        label = "Extremely polluted";
      }
      call1.set_brightness(0.5);
      call2.set_brightness(0.5);
      call1.perform();
      call2.perform();
      return {label};

light:
  - platform: monochromatic
    name: "Bottom Light"
    output: output_led_one
    id: bottom_light
  - platform: monochromatic
    name: "Top Light"
    output: output_led_two
    id: top_light

output:
  - platform: esp8266_pwm
    id: output_led_one
    pin: D5
  - platform: esp8266_pwm
    id: output_led_two
    pin: D6
Connecting to the device
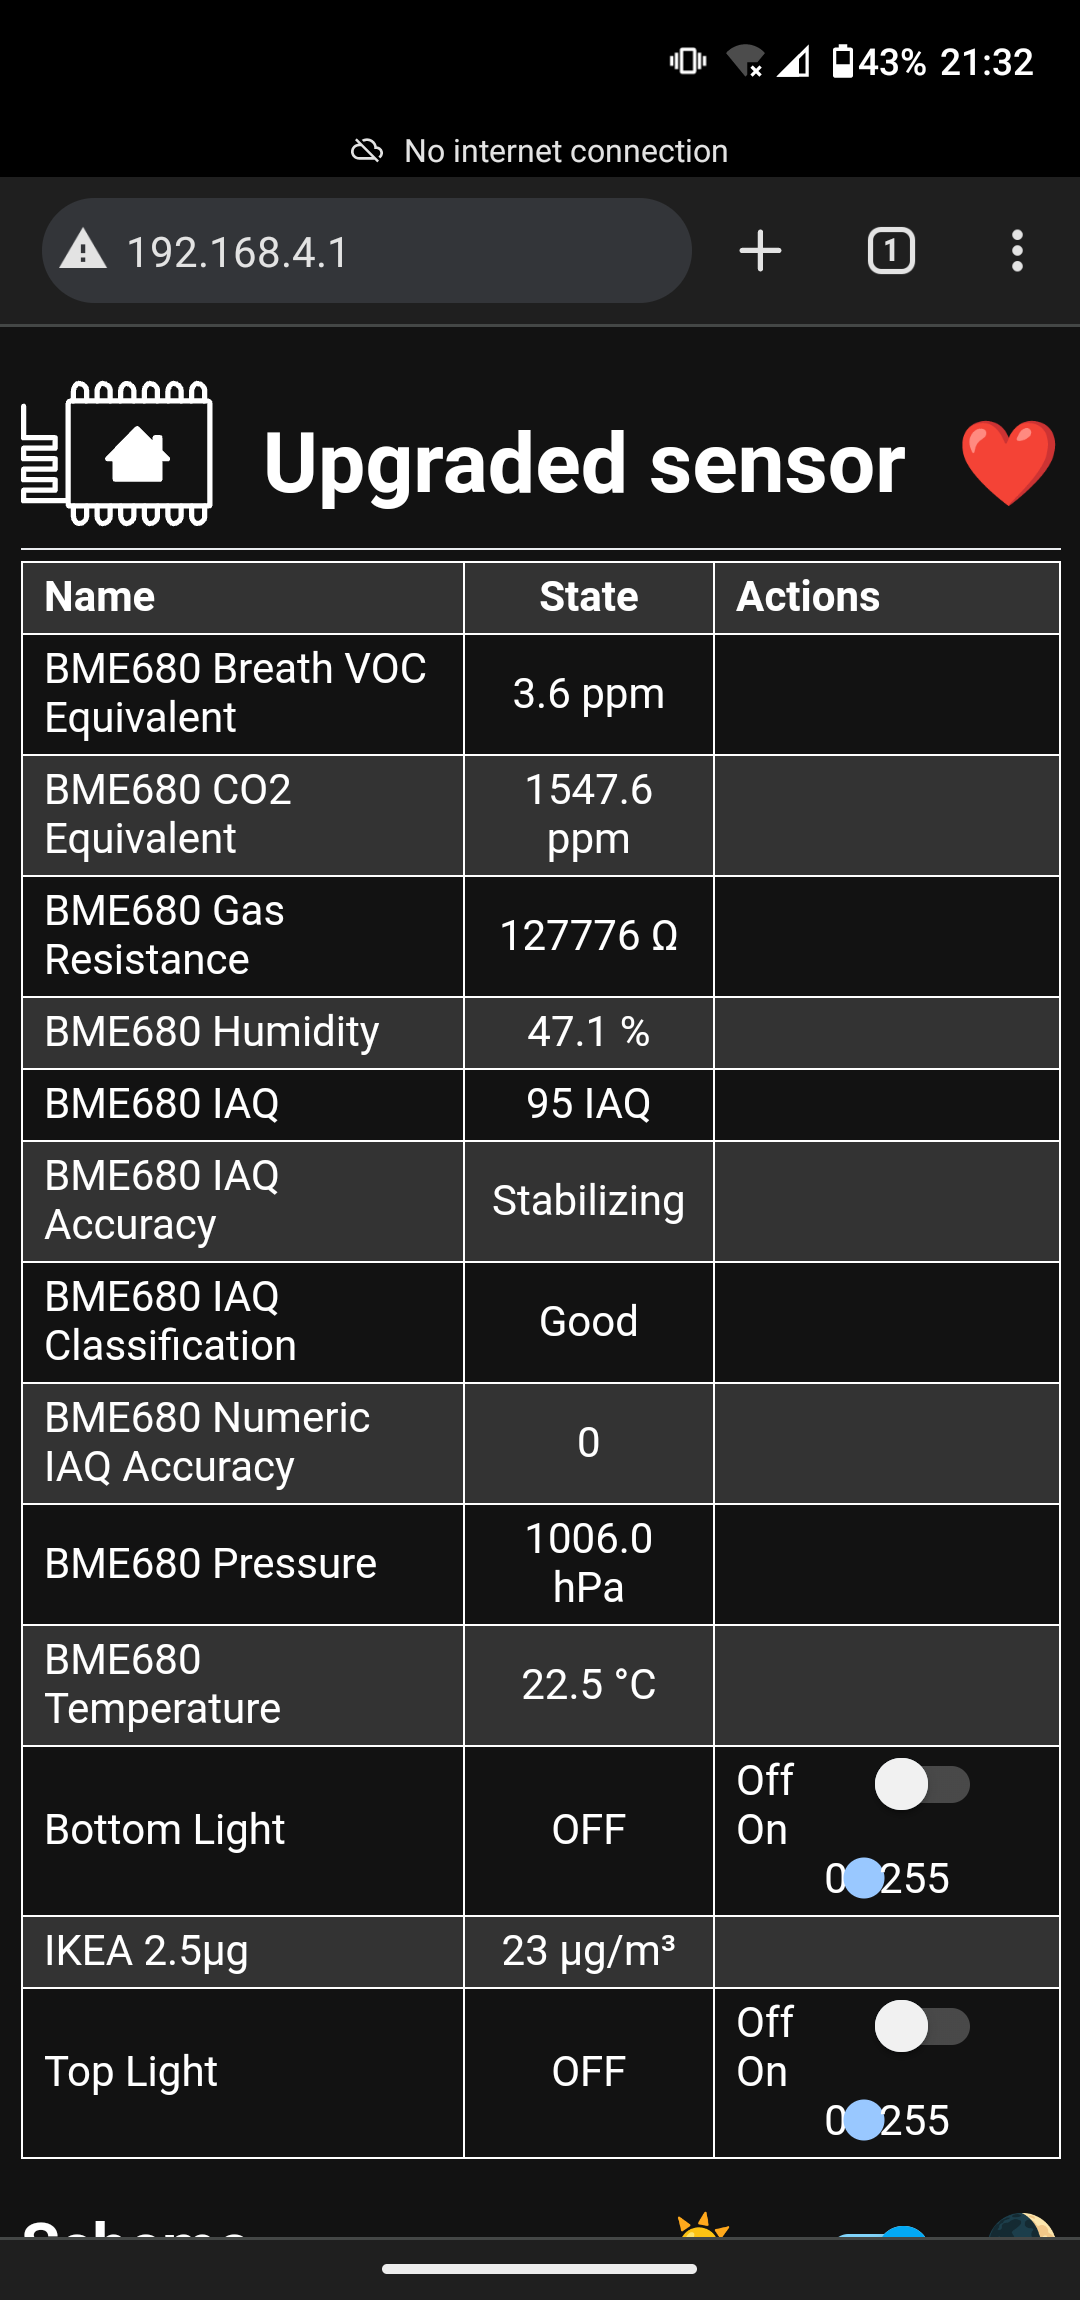
Connecting to your newly independent air quality monitor is straightforward. Power up the device, give it a moment to
initialize, and then use a pc/laptop/phone to connect to its WiFi network using the password you’ve set in the ESPHome configuration.
A heads-up: you might get an alert about the absence of an internet connection. No worries,
this is expected. Simply launch your web browser, navigate to 192.168.4.1, and a web page displaying the current
air quality readings will greet you.
Conclusion
This project showcases two really cool features. The first is how to implement simple automations directly in ESPHome,
making them much more resilient. Should the WiFi go down or the server running Home Assistant (HA) crash, they will
continue to work. The second feature is configuring an ESP8266 to function as a WiFi access point while hosting a
simple website. This provides an interface that can be incorporated without the need to add extra components to
your project!
0 Comments