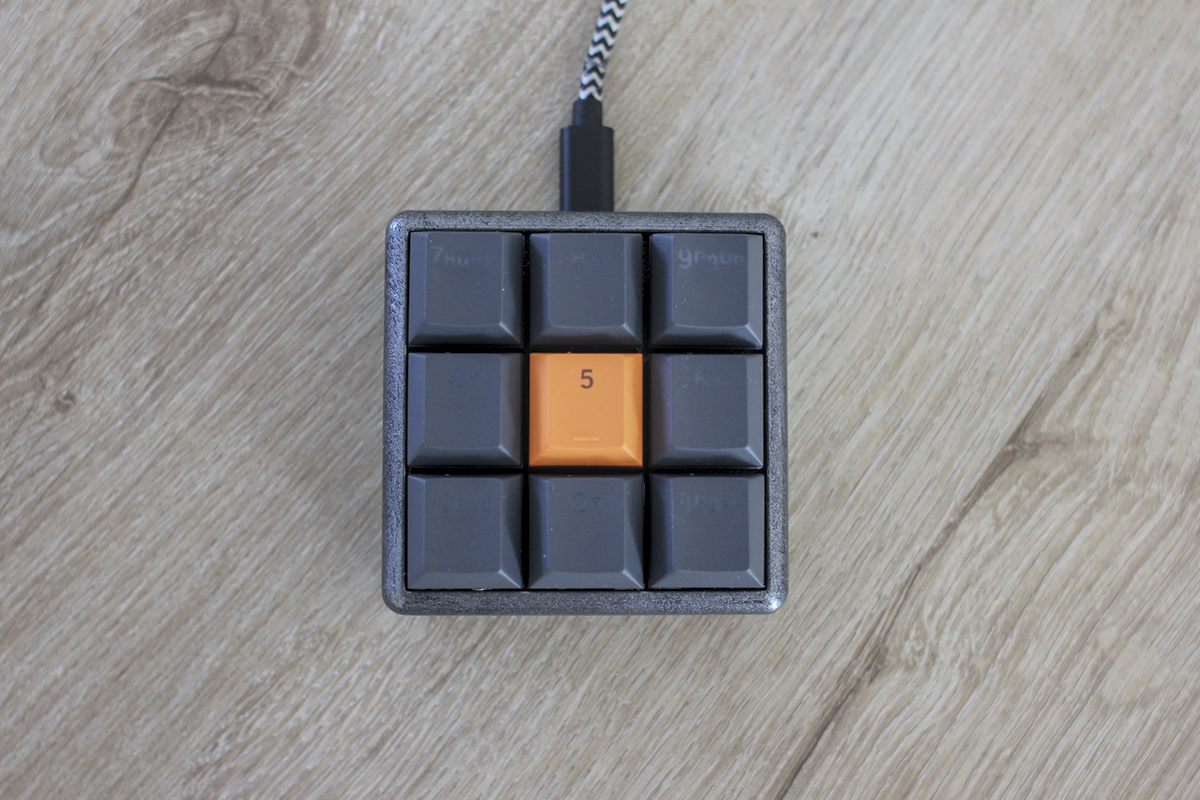
With a MIDI library available for the Raspberry Pi Pico making a little MIDI “piano” is relatively easy. The MacroPad
which I build last month is the perfect little device to play around with this. If you are interested in how to connect
buttons and LEDs to a Pi Pico, check out that post here!

A MIDI controller behaves different from a USB keyboard; once a key is pressed it generates a MIDI signal that can be
picked up by a compatible instrument or software to produce a sound. The signal contains the note that needs to be
played, but can also contain the velocity (how fast/hard a key is pressed). Furthermore,
it is possible to send signals to bend notes, set the volume of an instrument, … Keys also don’t repeat after being
pressed longer. So there are a number of thing to change in the code.
Getting started
If you want to follow along exactly, first you’ll have to build my MacroPad, though pretty much any Raspberry Pi Pico
with a few buttons attached will do. Just make sure to update the code below so that the pins correspond with your
hardware.
The Raspberry Pi Pico will need to run CircuitPython for this to work, my MacroPad already had this but if you
start from scratch you’ll have to flash the correct firmware to the Pico. Next, connect the Pico to a computer, it will
show up as a USB drive. Get the AdaFruit MIDI library, and copy the folder adafruit_midi (from the repo) to the
lib folder on the Pico (create the latter if necessary).
You will also need to install a tool that turns the signals from a MIDI device into music. For Windows there is a free
tool Piano 10 which is fine to start with. Look for it in the Microsoft store.
Finally, create a file code.py in the root of the Pico drive and add the code below. Restart the Pico, and done !
You now have a functional MIDI device. Though, let’s go over the code, so you can change the parts to match your project
in case you aren’t using an exact replica of my MacroPad.
Turning the Pico in a MIDI device
The full code is shown here, and we’ll go over it step by step below.
import board
import digitalio
import pwmio
import time
import usb_midi
import adafruit_midi

from adafruit_midi.note_on import NoteOn
from adafruit_midi.note_off import NoteOff

midi = adafruit_midi.MIDI(midi_out=usb_midi.ports[1], out_channel=0)

print("MacroPad MIDI Board")

# Configuration, which LED pins are used, which buttons, how buttons map to notes
led_pins = [board.GP18,board.GP17,board.GP16,board.GP21,board.GP20,board.GP19, board.GP27, board.GP26,board.GP22]
button_pins = [board.GP13,board.GP14,board.GP15, board.GP10,board.GP11,board.GP12,board.GP7,board.GP8,board.GP9]

note_mapping = [
        ["C3", "C2"],
        ["D3", "D2"],
        ["E3", "E2"],
        ["F3", "F2"],
        ["G3", "G2"],
        ["A3", "A2"],
        ["B3", "B2"],
        ["C4", "C3"],
        ["G2", "G1"]
    ]

# Set up buttons
buttons = [digitalio.DigitalInOut(bp) for bp in button_pins]

for btn in buttons:
    btn.direction = digitalio.Direction.INPUT
    btn.pull = digitalio.Pull.UP

# Set up LEDs
leds = [pwmio.PWMOut(lp, frequency=1000, duty_cycle=0) for lp in led_pins]

# Set Initial Duty Cycles to 0 for each LED
duty_cycles = [0 for _ in led_pins]

# Key and trigger states
pressed_keys = [False for _ in button_pins]
triggered_keys = [False for _ in button_pins]

while True:
    for ix, btn in enumerate(buttons):
        pressed_keys[ix] = not btn.value
        if not btn.value:
            duty_cycles[ix] = 65025


    for ix, (pk, tk) in enumerate(zip(pressed_keys, triggered_keys)):
        if pk and not tk:
            print("note %d started" % ix)
            midi.send([NoteOn(a, 60) for a in note_mapping[ix]])
            triggered_keys[ix] = True
        elif not pk and tk:
            print("note %d stopped" % ix)
            triggered_keys[ix] = False
            midi.send([NoteOff(a, 0) for a in note_mapping[ix]])

    for ix, led in enumerate(leds):
        led.duty_cycle = duty_cycles[ix]
        duty_cycles[ix] = max(duty_cycles[ix] - 900, 0)

    time.sleep(0.01)
After loading all libraries a midi object is created with adafruit_midi.MIDI, this one liner will also turn the
Pico into a USB MIDI instrument. Now we can send MIDI signals using midi.send().
Next there are arrays defining which GPIO pins are connected to LEDs and buttons. This is how I wired up my device,
unless you are building an exact replica you’ll have to change this to match your circuit. There also is a list of notes
that will be played if a button is pressed. These need to be te same length, and the elements correspond. For instance
the LED connected to pin GP18, should be the one below the button connected to pin GP13 and when pressing that button
it will play notes “C3” and “C2”. Here an array is used for each button so multiple notes can be triggered
simultaneously, in this case playing a note, and the same note an octave higher. Similarly, you could also play an entire
chord at the time.
led_pins = [board.GP18,board.GP17,board.GP16,board.GP21,board.GP20,board.GP19, board.GP27, board.GP26,board.GP22]
button_pins = [board.GP13,board.GP14,board.GP15, board.GP10,board.GP11,board.GP12,board.GP7,board.GP8,board.GP9]

note_mapping = [
        ["C3", "C2"],
        ["D3", "D2"],
        ["E3", "E2"],
        ["F3", "F2"],
        ["G3", "G2"],
        ["A3", "A2"],
        ["B3", "B2"],
        ["C4", "C3"],
        ["G2", "G1"]
    ]
After defining these, there is a bit of boilerplate code to initiate the LEDs and buttons. This is identical to
the code in the MacroPad.
For a MIDI device keystrokes need to be handled differently than for a computer keyboard. If you hit a key on a piano and
hold it, it will not start repeating after a brief moment like hitting a letter key on your computers keyboard. So
key presses are handled by keeping track of their state in two lists. As soon as a button is pressed, the corresponding
position in pressed_keys will be set to True, once it is released it will be set to false.
The list triggered_keys is used to store for which keys a signal already has been sent.
# Key and trigger states
pressed_keys = [False for _ in button_pins]
triggered_keys = [False for _ in button_pins]
The main loop will listen to key presses and handle them, note that the way the LEDs are handled is identical to the
previous post, so this will not be discussed here again (that part has been removed in the block below for readability).
The first thing that is done is loop over all buttons and check if they are pressed, if they are we set pressed_keys
to True. Next, we loop over pressed_keys and triggered_keys and check for keys which are pressed down
and have not triggered a MIDI signal. If that is the case, the Note On signal is send and triggered_keys set to
True. The line midi.send([NoteOn(a, 60) for a in note_mapping[ix]]) will send the event for all notes
linked with that button. The velocity, the number 60, here is constant as there is no way to check how hard/fast
a button was pressed.
Keys which are no longer pressed down and which are still in a triggered state require a Note Off signal to
be emitted, this is done similarly to setting a Note On with midi.send([NoteOff(a, 0) for a in note_mapping[ix]]).
Here triggered_keys is set to False for the released button.
As there is no need to do anything when pressed_keys and triggered_keys are in the same state we wait for
a brief moment with time.sleep(0.01) before the loop repeats the entire block.
while True:
    for ix, btn in enumerate(buttons):
        pressed_keys[ix] = not btn.value

    for ix, (pk, tk) in enumerate(zip(pressed_keys, triggered_keys)):
        if pk and not tk:
            print("note %d started" % ix)
            midi.send([NoteOn(a, 60) for a in note_mapping[ix]])
            triggered_keys[ix] = True
        elif not pk and tk:
            print("note %d stopped" % ix)
            triggered_keys[ix] = False
            midi.send([NoteOff(a, 0) for a in note_mapping[ix]])

    time.sleep(0.01)
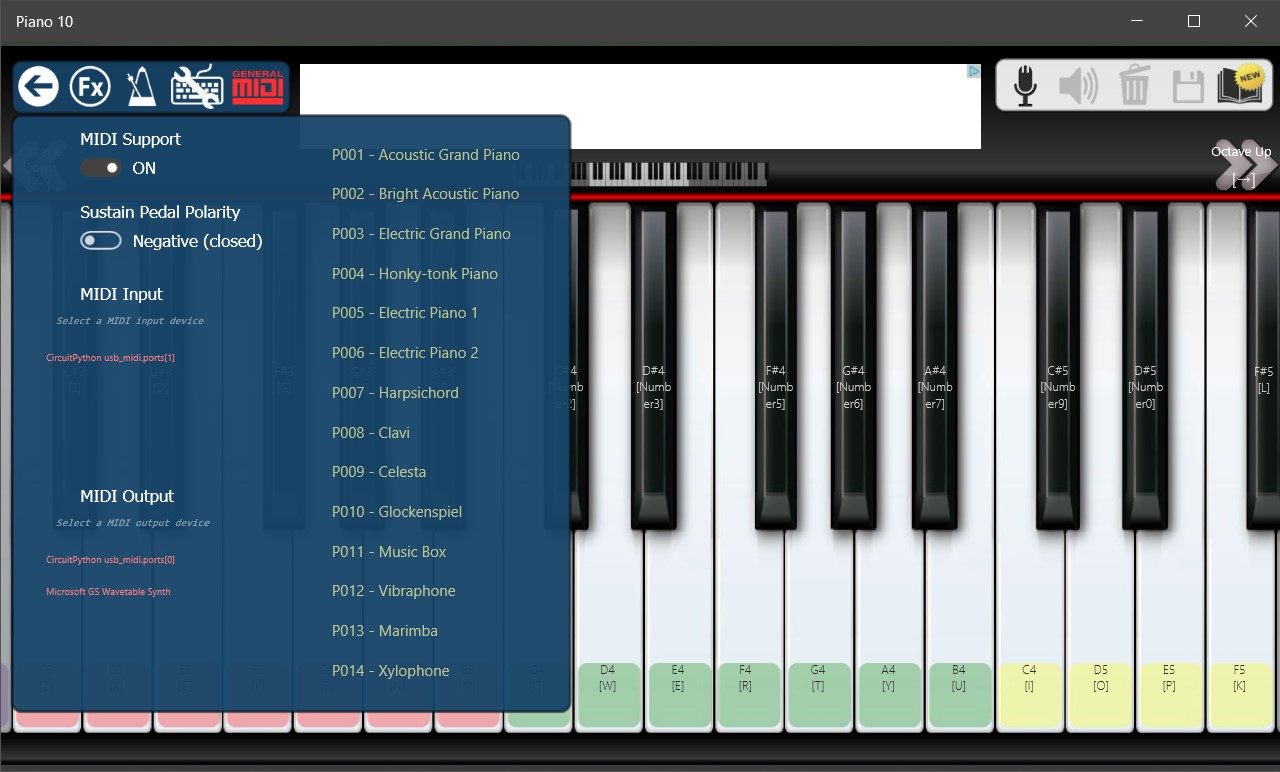
Connecting with MIDI software
If everything is properly working, the Pi Pico should now show up as a MIDI device in software that can work with
MIDI controller. In Piano10 click the MIDI button and select the Pico as the input device as shown below.
Once you start pressing keys, Piano10 will highlight the notes played on the on-screen keyboard and play the
sound.

Songs you can play with nine keys
As the buttons can be reprogrammed, you can essentially play songs with up to nine notes. With a simple diatonic one
octave scale there are plenty of nursery rhymes you can play. “Frère Jacques”, “Twinkle Twinkle Little Star”,
“Row Row Row Your Boat”, “Oh Susanna”, “Oh, When The Saints”, …
If you do reprogram some buttons you could play “Happy Birthday”, “7 Nation Army” (The White Stripes), and probably
many, many more.
You could also map each button to “strum” a full guitar chord which would let you play a few sing-alongs. However, without
strumming patterns it might sound a bit flat and uninteresting.
Conclusion
Having a very “clicky” keypad as a MIDI controller isn’t the best, you probably want something with quieter
buttons. Though as a proof-of-concept how to set up Raspberry Pi Pico as a MIDI controller it is a great demo! While
you’ll probably outgrow the nine buttons of this keyboard if you are serious about creating music, it is a fun way to
get into creating/working with MIDI devices and maybe learning how to play a few nursery rhymes along the way.
Update: If you liked this post, have a look at a more recent version of the MIDIpad code.
This improves handling chords and includes two modifier buttons to expand the number of notes that can be played
substantially.
0 Comments