Doing an electronics project where space comes at a premium? A regular rpi pico is to large? Have a look at the
XIAO-RP2040 from Seeed Studio.
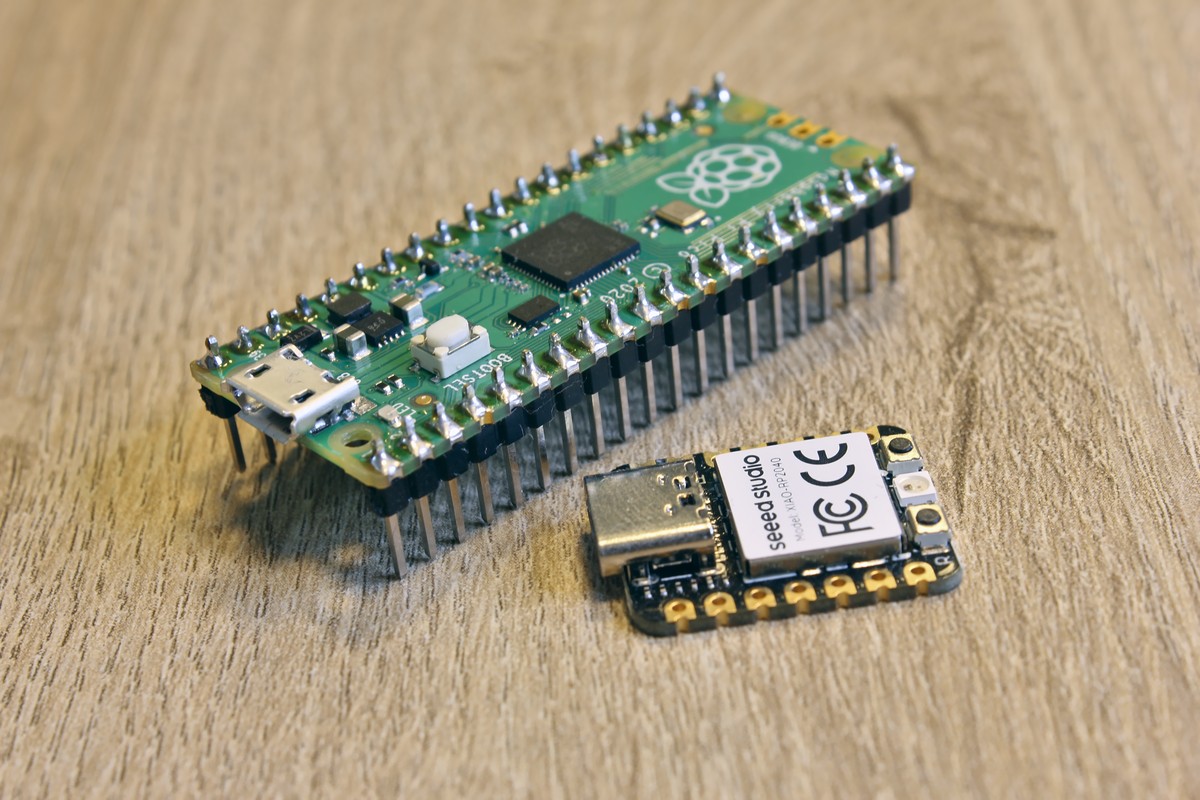
Seeed Studio provided me a XIAO-RP2040 to review so let鈥檚 have a look at this nifty little board. The microchip is
identical, though as fewer pins are broken out the size of the board is reduced to about 1/3 of the original Pi Pico.
Despite its diminutive size, the XIAO-RP2040 has a few things going on that are very interesting. There is a
reset button, which means no more un-plugging and re-connecting in case a bug in the code causes a crash. In
addition to the onboard LED, there is a NeoPixel RGB LED included on the board itself. Last, but definitely not least,
the XIAO-RP2040 comes with a USB Type-C connector, making your projects future-proof.
Getting Started
The board came loaded with Arduino firmware, however loading CircuitPython was a breeze. Just follow the official
instructions. In a nutshell, you need to be holding the boot button while connecting to a computer. The device will
appear as a USB drive on your computer and you simmply drop the CircuitPython .UF2 file there and restart.
For our little test program we鈥檒l use the NeoPixel, which requires AdaFruit鈥檚 NeoPixel package, simply download the
library that matches your version of CircuitPython and copy it to the ./lib/ folder on the XIAO-RP2040. Again,
the exact workflow that should be used on the Pi Pico also applies to the XIAO-RP2040.
Running Some Code
To get the NeoPixel to run, knowing which GPIO pins it is connected to is important. The full schematic of the board
is available, but it takes some knowledge how to read those to find the information needed. Though in a nutshell, there
are two pins of importance
- GPIO pin 11 provides power to the NeoPixel and should be configured as an output and set to
True - GPIO pin 12 is used to send instructions to the NeoPixel to set the color. AdaFruit鈥檚 NeoPixel package will do
the heavy lifting here, we just need a few functions to initialize everything and set colors.
Initializing the board requires a few lines of setup code. These lines will set pin 11 as an output and set it high so
the NeoPixel is powered on.
neop = digitalio.DigitalInOut(board.GP11)
neop.direction = digitalio.Direction.OUTPUT
neop.value = True
Next, a few lines are needed to initialize the neopixel. We鈥檒l keep the brightness at 30% as without a case this is
more than enough.
pixel_pin = board.GP12
num_pixels = 1

pixels = neopixel.NeoPixel(pixel_pin, num_pixels, brightness=0.3, auto_write=False)
Setting the LED to a specific color is easy using pixels.fill((255, 0, 0)) followed by pixels.show().
pixels.fill() takes a tuple with three values, these are the RGB values ranging from 0-255, e.g. (255,0,0)
is bright red.
Though in the example below the example code from the NeoPixel library is used to make the LED cycle gradually through
a range of colors. The full code is shown below, this can be copy-pasted into code.py on the device and after a
quick reset the onboard RGB LED will start cycling slowly through the rainbow鈥檚 colors.
import time
import board
import digitalio
import neopixel
from rainbowio import colorwheel

print("Starting Neopixel")

neop = digitalio.DigitalInOut(board.GP11)
neop.direction = digitalio.Direction.OUTPUT
neop.value = True

pixel_pin = board.GP12
num_pixels = 1

pixels = neopixel.NeoPixel(pixel_pin, num_pixels, brightness=0.3, auto_write=False)

def rainbow_cycle(wait):
    for j in range(255):
        for i in range(num_pixels):
            rc_index = (i * 256 // num_pixels) + j
            pixels[i] = colorwheel(rc_index & 255)
        pixels.show()
        time.sleep(wait)

while True:
    rainbow_cycle(0.1)  # Increase the number to slow down the rainbow
Conclusion
The XIAO-RP2040 is a great alternative to the official RPi Pico when you don鈥檛 need all GPIO pins. The addition of a
reset button is convenient while developing, and I鈥檓 all for having USB Type-C connectors everywhere. The only downside
is that obtaining these in Europe will get somewhat expensive compared to Pi Pico鈥檚 which are more commonly available.
Since it is fully compatible with existing RPi packages it should be to create things like a Macropad or MIDI device
using these, just like you would with a Pi Pico. Though I鈥檓 thinking about retrofitting it into e.g. an old Nokia 3310
as this is where the small form-factor will really come in handy! Feel free to reach out and tell me what you would
like to see me use this board for!
0 Comments